Skip to content
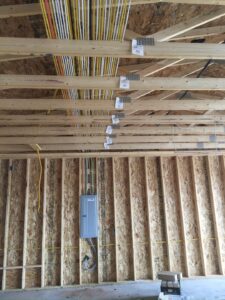
The electrical rough-in process is where a new home’s electrical system actually takes shape, long before drywall goes up and anyone can see the work. On day two of a recent rough-in, our crew measured out kitchen island lighting, hung recessed cans, set a ceiling fan box, wired a bath fan, and pulled wire while checking their work against actual code sections along the way. We filmed part of that day, and it is a good look at how much precision goes into a stage of the job most homeowners never see.
Measuring Before Anything Gets Mounted
Kitchen island lighting starts with the cabinet layout, not the fixture. On this job, the cabinet measurement came in at 72 inches, but the crew added a half inch to account for the drywall that would eventually finish out the wall, bringing the working number to 72.5 inches. From there, the total broke down into a 4-foot island, 3 feet of cabinets, and a 1-foot overhang, adding up to 102 inches total. When the math landed exactly on that number, it confirmed the interior design team’s layout was accurate before a single hole got drilled.
A laser level aligned with a roof truss gave the crew a fixed, repeatable reference point for the rest of the layout, which matters more than it sounds like it should. One measurement built on a bad reference point turns into several fixtures that are all consistently off by the same amount.
There is also a simple trick for centering an electrical box that avoids eyeballing it entirely. Rather than guessing at the center point by looking at the box from a few feet away, the crew measures to where the center should fall, then subtracts half the box’s width from that number to get the correct edge measurement. For a 4-inch box, that means subtracting 2 inches from the center measurement. It is a small piece of math, but it takes the guesswork out of a step that is easy to eyeball incorrectly.
Setting Can Lights and Ceiling Boxes
It’s important that can lights and fan boxes are installed properly before drywall goes up.
After hanging a recessed can light ring, the crew tests it by sliding the housing back and forth. Once it moved freely, they knew it was installed correctly and could move on.
Centering fixtures accurately at this stage is one of the small habits that separates a careful electrical rough-in process from one where problems only show up after drywall. The ceiling fan box in the primary bedroom took a few passes to center correctly between reference points, adjusting the measurement slightly each time until it landed right. In a closet nearby, a bar light fixture got centered between an attic access panel and an HVAC duct using the same careful, consistent measuring approach.
Mounting the fan box itself involves its own small details: a marked ground screw location, a knockout that has to be removed before wiring, and a cable connector printed with orientation instructions so it goes into the box the correct way. The crew also set a laser dot to confirm the box is dead center before the final mounting screws get tightened down.
Installing the bathroom exhaust fan meant removing the shipping tape holding the fan’s flap shut, since leaving it on would keep the flap from opening once the fan was running. The duct connection gets clamped with a metal ring and wrapped completely in foil tape, with close attention paid to getting good adhesion against the metal surface rather than just covering the seam.
Running Wire and Meeting Code
Pulling wire off the spool is straightforward until someone runs out halfway through wiring a box, at which point it becomes a team effort: reloading the spool and getting wire back to the person waiting on it rather than letting the wire pull stall. It is a small moment, but it is a good example of how the electrical rough-in process actually runs as a crew job rather than a set of individual tasks.
The finish work at each box follows specific National Electrical Code requirements, and the crew calls them out by number as they work. NEC 300.14 requires at least 6 inches of free conductor at each outlet, junction, and switch point, which is what gives an electrician enough wire to actually work with when making a connection or troubleshooting later. A separate provision in Article 314 covers how far a cable’s outer sheath needs to extend inside the box beyond its connector, generally at least a quarter inch, which protects the individual conductors from abrasion where the cable enters the box.
Wire connections get twisted securely with wire connectors, then tucked behind the ceiling box so the drywall installers working the next phase will not catch a connection or knock a wire loose while hanging sheets. When a box cover did not sit flush, the crew caught it immediately, traced it to a screw that was not holding, and fixed it on the spot rather than leaving it for someone to find during inspection.
None of these checks are visible once a house is finished, but they are exactly what separates a well-run electrical rough-in process from one that gets flagged for rework at inspection. If you are planning a new construction project in Rapid City, Sturgis, Spearfish, Hot Springs, Piedmont, Hermosa, Black Hawk, Belle Fourche, or anywhere else in the Black Hills,, having an experienced crew handle your rough-in from the start means fewer surprises at every stage that follows.
Contact our commercial team today to discuss your project and schedule your electrical rough-in with an experienced crew.